Try it in your web browser: clownmdemu.clownacy.com
Download: https://github.com/Clownacy/clownmdemu-frontend/releases/tag/v0.7
It is finally here! With my job resuming tomorrow, I decided that I should release what has been completed so far before I have far less spare time. The main feature of this update is greatly-improved Mega CD support, allowing Sonic CD to be played from beginning to end. But that is not all: there are also bugfixes, improvements to accuracy and user-friendliness, and the emulation of even more Mega Drive features!
Fixes for After Burner II and Jim Power
As covered in a previous blog post, compatibility with two games has been improved by correctly emulating two quirks – one in the 68000 CPU and one in the SN76496 sound chip.
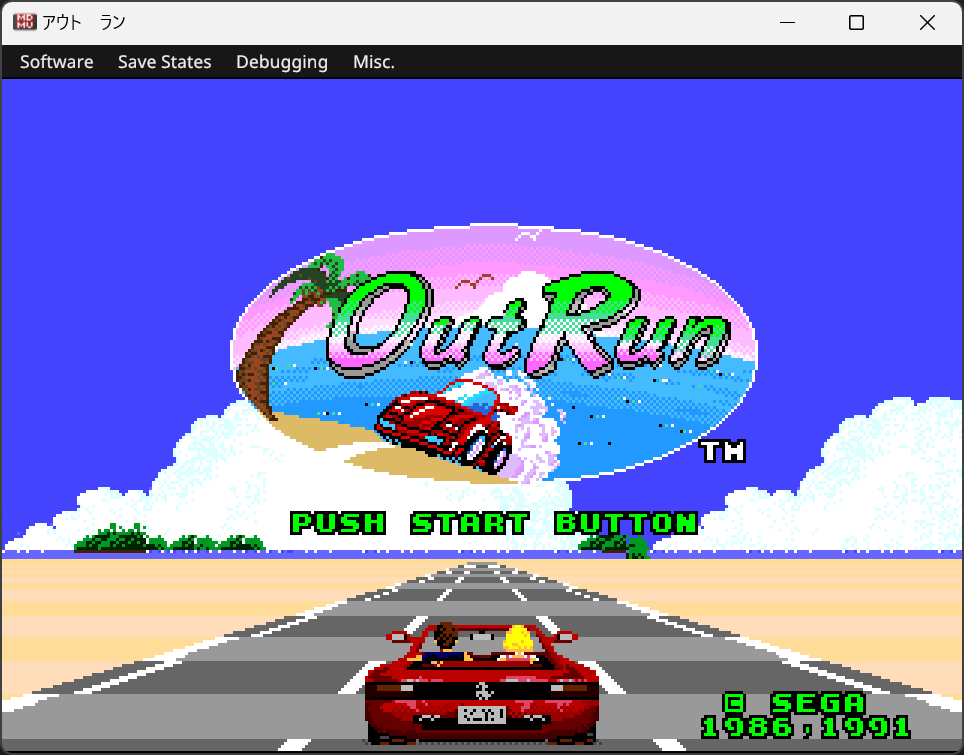
Use Software’s Name as the Window Title
Unlike other emulator developers, I see my emulator as less of a Mega Drive simulator and more of a Mega Drive compatibility layer. With that in mind, the frontend should provide as ‘thin’ a layer between the running software and the user as possible. One area where this was not the case was the window title: if the user was playing Sonic the Hedgehog, then the window’s title should be ‘Sonic the Hedgehog’, but, instead, it would always be ‘clownmdemu’. That issue has now been fixed.

How does the emulator know what the software’s name is? Sega required that software made for the Mega Drive have a header, and this header includes a name. Here is the header for Sonic the Hedgehog:
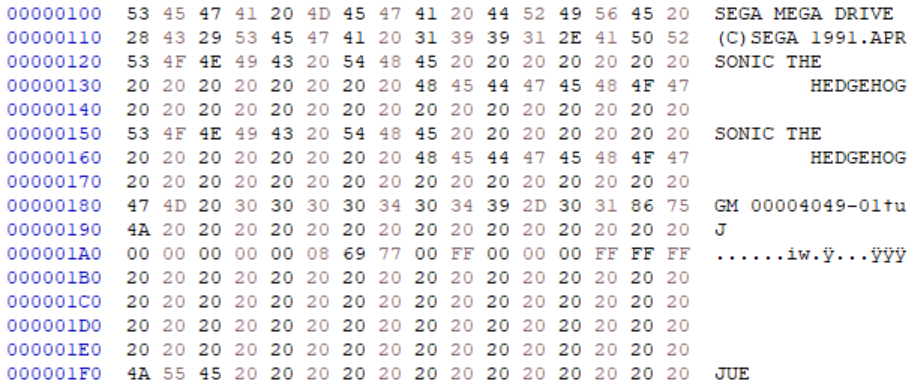
The header includes many things: the target console, a copyright notice, the software’s unique serial code, revision number, a checksum, compatible accessories, ROM size, RAM usage, regions, and two names. One name is for Japan, and the other is for everywhere else. The emulator will display the name that matches the region that the emulator has been set to.
Notably, the names are encoded in SHIFT-JIS rather than ASCII, allowing them to contain Japanese!

Columns‘ header seemingly contains gibberish…

…until you decode it as SHIFT-JIS!
This feature was slightly awkward to implement: while the names are SHIFT-JIS, the window title must be UTF-8, so the names have to be converted. SDL2 has built-in text encoding conversion, but it does not support SHIFT-JIS, so the emulator has to perform this conversion on its own. Fortunately, I had already tackled SHIFT-JIS-to-Unicode conversion before for the CSE2 project, so I could just copy the code which I had written for that. That code would output UTF-32, however, so I needed to write an additional converter to turn UTF-32 into UTF-8.
With all that done, users can now see the name of the game that they are playing!
Implement the V Part of the H/V Counter
I dread implementing the H/V counter, as it is a hardware feature which I am very unfamiliar with, which does not seem to be particularly well-documented, and which would require significant refactoring in order to be emulated ‘properly’.
The H/V counter is a value that the 68000 CPU can read from the VDP to tell which pair of pixels (or a ‘slot’) it is currently (or would be) drawing. My VDP emulator currently draws in increments of entire scanlines instead of slots, so the H counter would be awkward to implement. However, the V counter would be simple to emulate, albeit inaccurately (the real V counter continues counting upwards even after the last scanline has been drawn).
Implementing this fixed issues in multiple games:


I would have implemented this long ago had I known that I had not already done so. It was such a simple feature that I thought I implemented it back when I first wrote the VDP emulator, but I had not. Silly me.
Vastly-Improved Mega CD Support
For the first time, this project has received improvements from another developer! Devon has recently been learning the inner-workings of the Mega CD, and applied that knowledge to improving this emulator!
Fixes and Accuracy Improvements
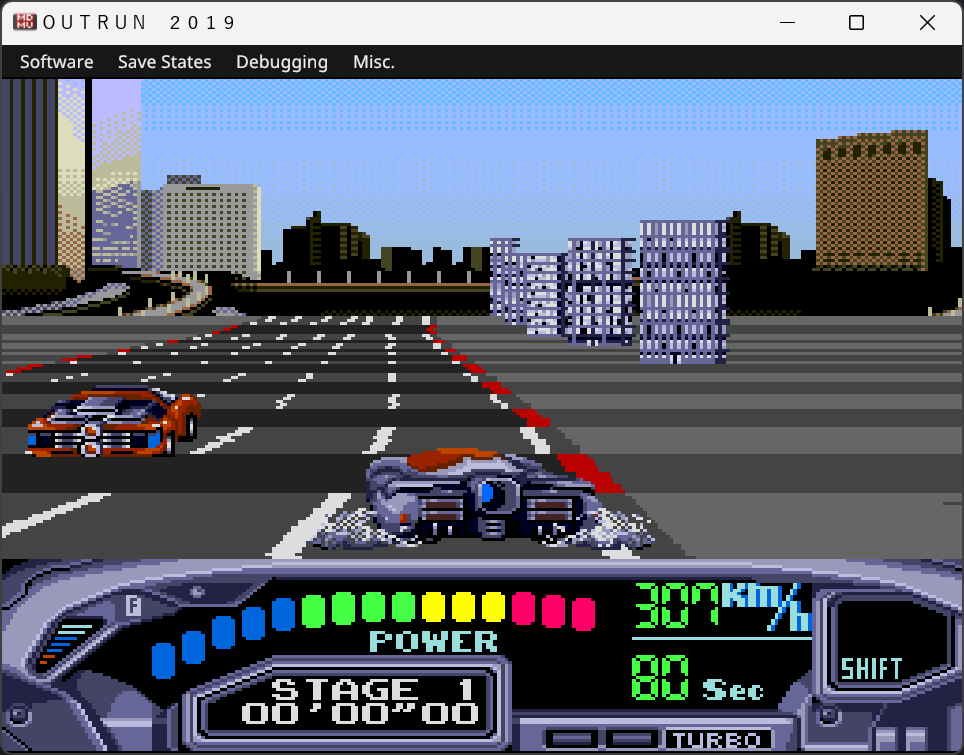
It began with fleshing-out the stub LLE BIOS to handle level-2 interrupts and implementing a few stubs for the Mega CD’s graphical capabilities. What sounds like relatively-unimportant busywork actually made a significant difference: with these changes alone, Sonic CD was finally able to progress past its title screen and into gameplay!

From analysing the game with my 68000 disassembler, I knew that the freeze on the title screen was caused by the game waiting for an interrupt to occur, but I did not expect that interrupt to be related to graphical operations of all things! After all, the title screen itself was running just fine, despite its use of that fancy cloud effect.
But this was just the beginning! Additional fixes rolled-in to properly-support the Mega CD’s horizontal interrupt setting, allowing the game’s water levels to run without crashing!

Curiously, this feature suggests that the Mega CD’s bus has a nasty hack in it to allow two specific bytes of the BIOS ROM’s vector table to be overwritten. It may not be pretty, but it works.
Also, a bug within the Mega CD hardware was emulated, allowing the game’s FMVs to look correct:
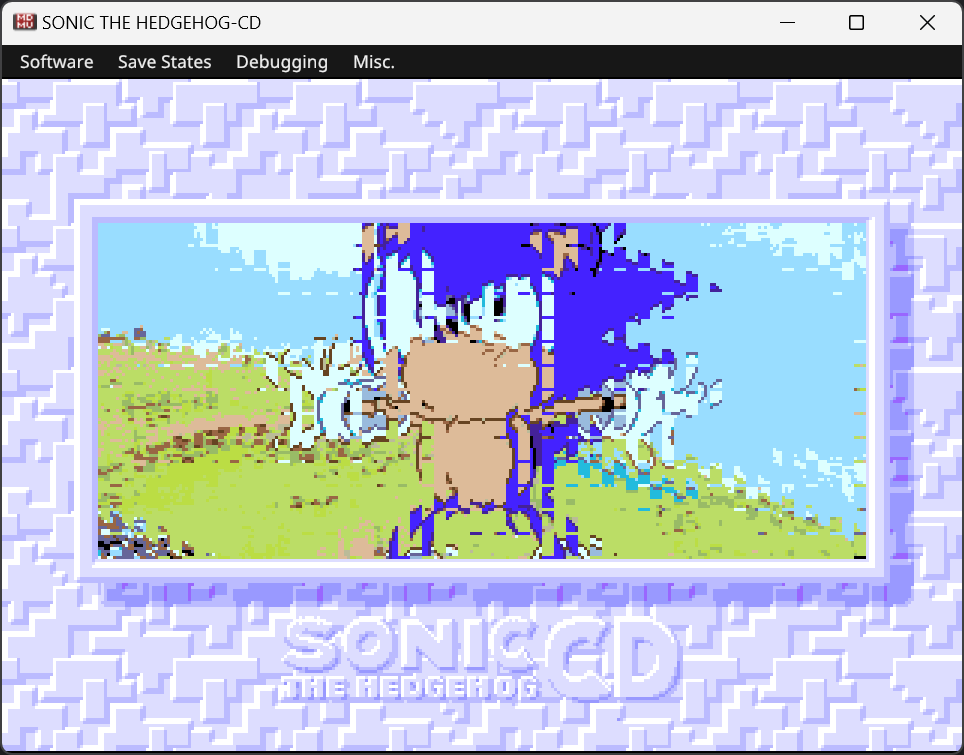

The way that this bug works is that DMA transfers which are performed from the Mega CD’s Word-RAM suffer from a delay, causing all transferred data to be offset by one word. This is simple to emulate in the bus logic, just like the aforementioned horizontal interrupt override.
New BIOS
Along with these fixes came a whole new stub BIOS! Courtesy of Devon, this BIOS has been created by reverse-engineering the original Sega BIOS, accurately implementing a wealth of features! At the point, calling it a ‘stub’ BIOS might seem a bit harder to justify given how much more complex it is, but this new BIOS does not replace the high-level emulation that already exists. Like the original stub BIOS, this new BIOS merely handles tasks which would have been cumbersome to emulate in a high-level manner, such as invoking the Sub-68000 program and handling interrupts.
Devon was particularly concerned with compatibility when creating this BIOS. Because of this, the BIOS also supports briefly displaying a splash-screen on boot:

The original Mega CD BIOS features a well-known animation, showing the Sega logo. When this animation is complete, the BIOS does not unload its graphics. Because of this, software is able to use these graphics in various ways, such as in a transition effect or by using the font for displaying a menu. In order to allow these effects to be enjoyed, this splash-screen is needed.


Emulation of the RF5C164 PCM Chip
With Sonic CD being playable from beginning to end, the lack of emulation for various Mega CD components has become quite evident: the special stages lack their floor graphics, CD-DA music does not play, and PCM sounds are not audible. To begin addressing this, Devon and I have implemented PCM emulation!
The RF5C164 is pretty rudimentary: it has 8 channels which sample PCM audio from the chip’s dedicated RAM in a nearest-neighbour manner, and this sampled data is scaled by the channel’s volume and panning settings before being mixed with the other channels’ sample data. Compared to the YM2612, this is simple. There are still a number of edge-cases that need to be tested on real hardware, but otherwise this chip is now fully emulated.
Emulate Level-3 Sub-68000 Interrupt
Unfortunately, emulating the PCM chip alone was not enough to get Sonic CD’s PCM audio to play. This is because the game’s sound driver only runs in response to the level-3 interrupt of the Sub-68000 CPU. Without implementing this timer, you get no PCM audio at all. Without implementing this timer correctly, you get this:
I expected this timer to be difficult to implement, due to how concurrency of emulated components works in my emulator, but it proved to be fairly easy. With this, Sonic CD’s PCM audio finally worked… mostly.
The reason for the speed being wrong was that the Mega CD has its own master clock, which differs from the one in the Mega Drive (50MHz instead of 52MHz). The emulator was not designed with multiple master clocks in mind, so Mega CD emulation was using the Mega Drive clock instead.
After some refactoring and many headaches, support for multiple master clocks was added and PCM audio finally sounded correct!
But there was still more to do: PCM is just one of two extra forms of audio that the Mega CD adds!
Emulation of CD-DA Playback
The PCM chip works by playing and mixing individual audio samples in real-time. This is old-fashioned, working somewhat like a MIDI file. On the other hand, CD-DA (Compact Disc – Digital Audio) is much more modern: it is a direct recording of music, just like an MP3 or WAV file. This frees the music from limitations such as the number of channels, juggling usage of channels with SFX, and ensuring that samples fit within a buffer. The downside to CD-DA music is that it is massive: Sonic CD‘s Palmtree Panic Present music is around 15MiB, which is 30 times larger than the entirety of Sonic 1!
Sonic CD uses both PCM and CD-DA forms of music: using PCM for the music of the ‘past’ levels, and CD-DA for the music of the ‘present’ and ‘future’ stages. If I wanted Sonic CD to be fully emulated, I needed to implement both of them.
CD-DA playback is a relatively high-level feature of the Mega CD: software simply sends commands to the sub-68000 BIOS to seek to and play audio tracks, with the actual process of fetching, processing, and playing the audio being hidden completely behind the BIOS. Since the BIOS is emulated in a high-level manner, this leaves me free to implement CD-DA playback however I want, without worrying about low-level details such as emulating a CD drive’s controller chip.
CD-DA audio data is raw 16-bit stereo PCM, just like a typical WAV file. It is not stored in any compressed or encrypted form, allowing it to be read by simply copying data directly from the disc image. The emulator’s audio mixer just so happens to take 16-bit PCM as its native input format, making the process of “emulating” CD-DA as simple as a single file read operation.
At the moment, features such as fading, fast-forwarding, and reverse playback are not emulated, but what is currently implemented is enough for most uses.
The biggest problem with adding support for CD-DA playback was actually the file format used by Mega CD game rips: instead of everything being compacted into a single file, like a cartridge ROM, Mega CD games are split to at least two files – a BIN file and a CUE file. The BIN file contains a raw dump of all of the CD’s sectors, while the CUE file contains a text-based expression of the CD’s Table of Contents. The CUE file format is strangely lacking in a concrete specification, requires slow and complicated text processing logic, and also outright requires the use of file IO. That last point especially is a huge problem, as the Emscripten port of the emulator is unable to use file IO due to running in a sandbox. This would not be a problem if both files were simply combined into one.
Another issue with CUE files is that it is possible for the audio tracks to be extracted from the BIN file and be stored as their own standalone files. These files can be encoded in the WAV format, Ogg Vorbis format, MP3 format, etc. This creates a huge burden for the emulator, as it needs to support every feasible audio format in order to support as many types of Mega CD disc rip as possible. This requires pulling in numerous audio libraries like libvorbis and minimp3, each one bringing its own licensing terms, executable bloat, and portability concerns.
In recent years, a new format has emerged: MAME’s ‘CHD’ format. This format combines everything into a single file, while applying lossless compression to reduce its gargantuan size. Unfortunately, the other problems that I listed above apply to this format at well: being such an elaborate format, and leveraging multiple forms of compression, numerous libraries are required in order to decode CHD files. Given that clownmdemu’s core is written in portable ANSI C while libchdr and zstd are not written portably at all, I really, really do not want to use them.
For now, the emulator supports the ‘BIN+CUE’ format. This still requires file IO which will prevent it from working in the Emscripten port, but it at least does not require additional libraries.
To help with supporting the wide variety of CD formats, I have split the emulator’s CD code off to its own library – clowncd. This can be used for more than just emulation, as shown by its test program, which can extract ISO and WAV files from a BIN+CUE rip.
6-Button Controller Support
Up until this point, the only type of controller that was emulated was the original 3-button controller. The emulator has now been extended to support the later 6-button controller, allowing software which supports it to be used with a more natural control scheme. Some games have cheat codes that are only possible to input with a 6-button controller.
This controller was considerably more complicated to support than the 3-button controller, due to it internally featuring both a counter and a timer that managed which buttons could be read by the Mega Drive at once. This is because the 9-pin port that the controller is plugged into is not enough to expose all of the button data at a single time. This was already a problem for the 3-button controller, which was solved by splitting the buttons into two groups and using one of the pins to select which group to be read with the other pins. The 6-button controller extended this, exposing the additional buttons after the ‘select’ pin has been strobed a certain number of times, and resetting this number after some time has passed. Emulating this required making the controller emulation logic able to measure time, similar to the CPU emulation logic.
Add Per-Operator Frequencies and CSM Mode to the YM2612 Emulation
The YM2612 has a strange feature, where the third channel can use four different frequencies instead of one. This feature is heavily used by Streets of Rage. A related feature is the so-called “composite sine mode” (CSM), which triggers a ‘key-on’ and ‘key-off’ of the third channel when Timer A expires. According to Chilly Willy, this feature is intended for speech synthesis, but no official Mega Drive games appear to use it.
When I created the YM2612 emulator, I did so in a very object oriented manner: the FM chip as a whole was an object, which contained 6 channel objects, which contained 4 operator objects, which contained a phase generator object and an envelope generator object. This was somewhat overkill, as such heavy encapsulation meant that objects did not share state, even if the components of a YM2612 actually did. Ironically, this actually worked in my favour, as it meant that each operator already had its own frequency, albeit one that was always set to the same value as the channel’s other operators. So, to add support for the third channel’s per-operator frequency mode, all I had to do was allow each operator to be assigned a unique frequency.
In the future, I hope to refactor the YM2612 emulator to be less encapsulated, allowing for the elimination of redundant duplicate state.
CSM was comparatively simple to emulate, however it is not entirely accurate. All that is needed is to call the key-on function twice when Timer A expires – one to turn it on, and the other to turn it off. A real YM2612 merely queues these operations, and performs them during the envelope generator update process. This delay could have side-effects which are not currently recreated in my emulator.
Implementing both of these features allows Nemesis’s CSM test ROM and Streets of Rage to work correctly.
Add SSG-EG Emulation
SSG-EG is yet another curious feature of the YM2612. I was able to implement it rather painlessly thanks to Nemesis’s wonderful documentation. The way that it works is that it builds upon the YM2612’s ADSR envelope generator, allowing the envelope to be played repeatedly, optionally with mirroring, inversion of the envelope’s attenuation, and with the option of having the envelope hold its final value when it ends. It is a bit of an esoteric feature, but many official games do use it.
A couple of games (an Olympics game and a Beavis and Butthead game) use SSG-EG in a way that is officially undefined, causing the YM2612 to behave in a buggy manner. In order for these games to produce audio correctly, SSG-EG must be implemented in a way that is as close to a real YM2612 as possible. Fortunately for me, this is exactly what Nemesis’s documentation helps to achieve.
SSG-EG is actually a leftover feature from the YM2612’s predecessor, the YM2608. In that chip, there was a “software-controlled sound generator” (SSG) module alongside the FM module. The YM2612 only contains the FM module, but since SSG-EG was part of the FM module and not the SSG module, it is present nonetheless. The SSG module and SSG-EG were necessary for providing compatibility with the AY-3-8910.
Fix Sonic 3‘s Competition Menu Music and Contra: Hard Corps‘ Snare
Ever since YM2612 emulation was first added to this emulator, one of the instruments in Sonic 3‘s Competition menu music was really loud. This was the only FM audio issue that I knew of which was caused by an actual bug rather than just a missing feature. That changed when BlastBrothers put together this huge list of audio issues, ranging from missing features to new bugs. In particular, Contra: Hard Corps has an FM snare drum that was playing completely differently to how it does on a real Mega Drive. I figured that, by fixing the underlying bug which was causing one of the inaccuracies, there was a chance that it would also correct the other inaccuracy.
To debug this, I began modifying the Sonic 3 disassembly to produce a ROM with a slightly different instrument, altering various settings within the instrument until the ROM sounded identically in both my emulator and a real Mega Drive. Eventually I discovered multiple ways to make the two sound the same:
- Change the sustain rate to 0 to match the decay rate.
- Change the decay rate from 0 to match the sustain rate.
- Change the sustain level from 0 to any other value.
The decay rate and sustain rate are two variables which control the ADSR envelope. The sustain level controls when the envelope switches from using the decay rate to using the sustain rate. These three modifications suggested that there was something wrong with how the sustain level was being used: since the instrument has a sustain level of 0, the sustain rate should be switched to immediately, leaving the decay rate unused, and yet the instrument would sound wrong in my emulator unless the decay rate matched the sustain rate. This meant that the emulator was using the decay rate when it should not be.
After some trial-and-error, I found the cause of the bug: the documentation which I had used to develop the YM2612 emulator was wrong!
As described in a previous blog post, I relied heavily on Nemesis’s documentation when creating the FM emulation. This documentation claims that the envelope generator is not updated on every sample; instead, it is updated every several cycles, depending on what the current rate is. Here is the pseudocode that was provided to illustrate this:
++globalCycleCounter
For each operator
    //Read the shift value from Table 1
    counterShiftValue = counterShiftTable[operator.rate]
    If (globalCycleCounter % (1 << counterShiftValue)) == 0
        //Check the current cycle we're up to (0-7)
        updateCycle = (globalCycleCounter >> counterShiftValue) & 0x07

        //Read the next attenuation increment value from Table 2
        attenuationIncrement = attenuationIncrementTable[operator.rate][updateCycle]

        //Update the attenuation
        //The attenuation update process happens here. More on that in the next section.
    Endif
Next operator
Because my emulator does just this, there is a large period of time before the emulator checks the sustain level and switches from the decay rate to the sustain rate. In reality, the YM2612 updates the envelope generator on every sample, and the current rate simply affects how much the envelope is progressed. This can be proven by examining Nuked OPN2, which is a transcription of the YM2612’s circuitry to C.
With this problem solved, both games sound correct. Just as I had hoped, fixing one inaccuracy also fixed the other!
Perfect Frame Advance Rewinding
Because the rewinding feature predates the frame-advancing feature, the former was not designed with the latter in mind. As a result, when used together, they exhibited latency: when toggling between advancing forward and advancing backward, it would take multiple frames for the change to actually take effect. There was also an additional problem where, when advancing backwards for the first time, it would not advance at all, merely duplicating the previous frame. The cause of this had to do with how the rewind feature’s ring buffer worked; particularly how it was read from and when it was updated. By adjusting these details, the latency is eliminated, making frame advance rewinding work perfectly!
Closing
So, here it is – one giant update. As always, there is plenty of work left to be done, but hopefully what is here already is enough to be useful.
